Santa Run Game in MIT App Inventor | App Inventor Game Full Tutorial
Hello friends,
Welcome to Obsidian Soft.
Today, in this tutorial, I will teach you how to make a cool Santa Run game in MIT App Inventor.
.png)
So, let’s begin by downloading Santa Sprite from opengameart (same place from where I got the zombie for my animation tutorial)
https://opengameart.org/content/santa-claus-free-sprites
Unzip and choose the idle 1 and all run images and copy and paste them to some folder. We need to rename them to remove the brackets as such filenames are not allowed in Android.
We also need to edit them. The actual animation is beautiful but the images have a lot of transparent pixels around them and this gives a problem as it seems that the Santa hasn’t even touched the candies and the game is over so we need to crop the images and remove all space around them.
You can use the following online tool for this:
https://www.imageonlinetools.com/trim-transparent-pixels
Just open up each image one by one, remove transparent pixels, and save with a name without brackets.
I also made a super simple background in Illustrator with just a basic snow landscape.

Don’t add any objects to this image as we will not scroll this image. Our Santa will just move his legs while standing in one place and our candies will move and this will give this amazing illusion of Santa running.
Create a new project in MIT App Inventor and name it SantaRun.
Upload background, Santa images, and a candy image by selecting them all and dragging and dropping them in the media section. Yes, I have figured out how to add multiple images at the same time 😀 in MIT App Inventor.
Let’s design our screen. For screen1, make align horizontal center, screen orientation portrait. Turn off title and status bar.
Next, drag and drop a canvas from drawing and animation.
Choose the uploaded background image as the canvas background. Make font size 40, height 85%, and width fill parent.
Drag and drop a button from the User Interface below this canvas. Rename it to startBtn. Change the title on it to Start. I will edit it to a black background, font white, font size 22 and bold, shape rounded and width of button 30%.
From sensors, drag and drop a clock. Rename to runTimer. Turn off the timer enabled and the timer always fires checkboxes. Change interval to 50 ms. This is for running animation.
Select this clock sensor and duplicate by pressing Ctrl + C and Ctrl + V for Windows and Command + C and Command + V for MacOS.
Rename to jumpTimer and change the interval to 800 ms. Again duplicate and rename to scoreTimer and change the interval to 200 ms.
Now, let’s add the image sprites to our canvas. Drag and drop an image sprite from drawing and animation onto the canvas. Rename to santaSprite. Now, you have to follow me exactly to get your game to work.
For santaSprite, make height=114 pixels and width=80 pixels. Choose the uploaded idle image as the picture for this santaSprite. Make sure that it is enabled. Interval is 70, rotate is turned off and speed is 0.
Duplicate santaSprite but rename to candySprite.
Make height and width both 30 pixels. Choose the uploaded candy image as the picture. Change the Heading to 180 as we want it to move left and change the interval to 100.
Our screen design is done so let’s go to the blocks section:
Make global variables:
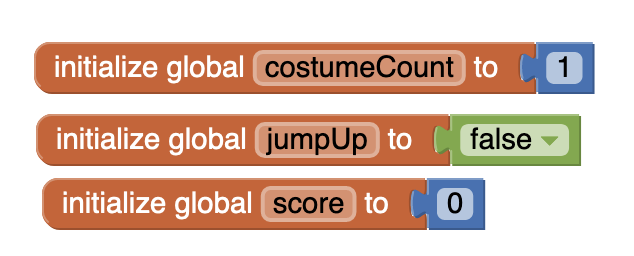
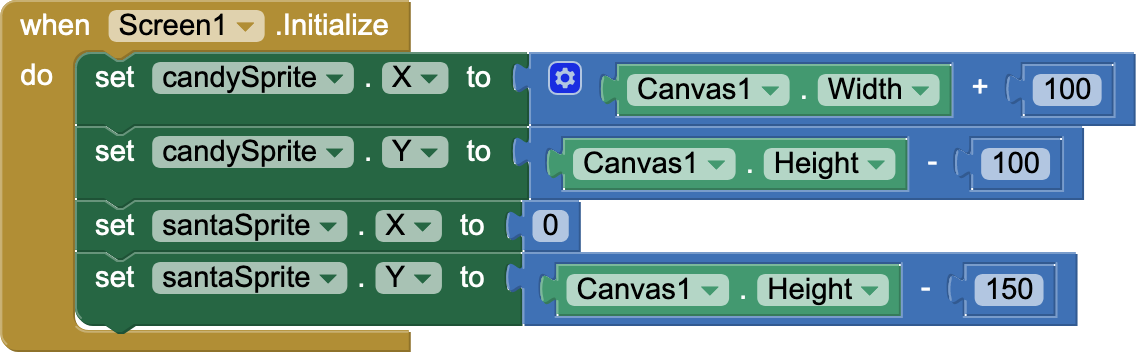
When the screen is initialized, let’s give proper positions to our sprites depending on canvas width and height: santaSprite on left and candySprite on right of the canvas.
First, let’s focus on Santa's animation of running. Our Santa will run by standing in one place.
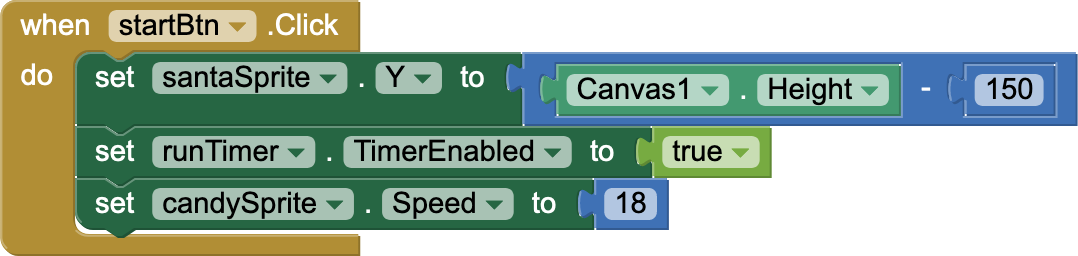
He will start running when the start button is pressed. So, get its click event and reset Santa’s y position in case the game stopped while he was in the middle of a jump. Also, start the run timer by enabling it.

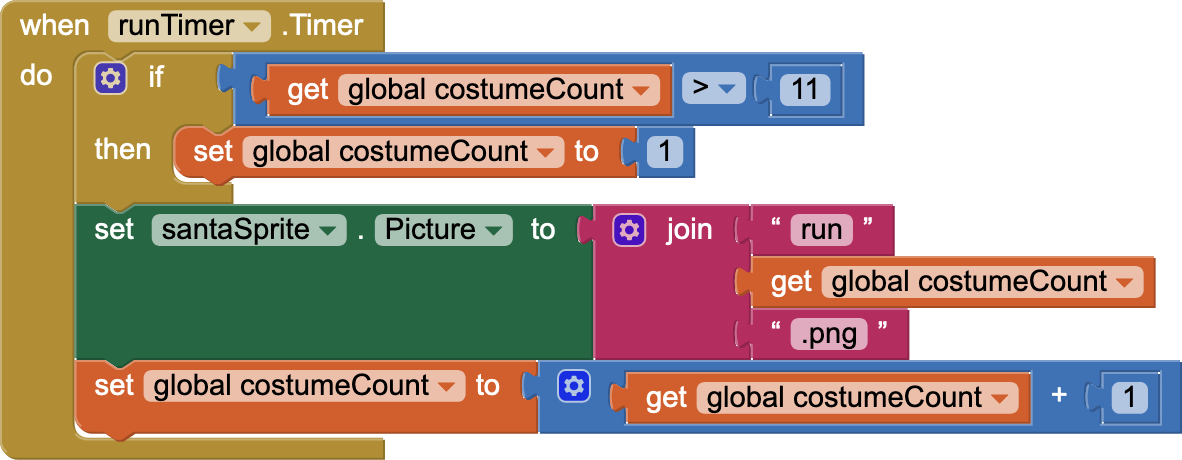
Now, get runTimer’s timer event. The Santa has 11 costumes or images for running so we will shift between them after every 50 ms (we set runTimer's timer interval to 50ms). First, check if the costumeCount is greater than 11. If it is then this means all costumes have been shown so set the costumCount to 1. In all cases, construct the costume’s image name using costumeCount and also increase the costumeCount by 1 for the next timer event.
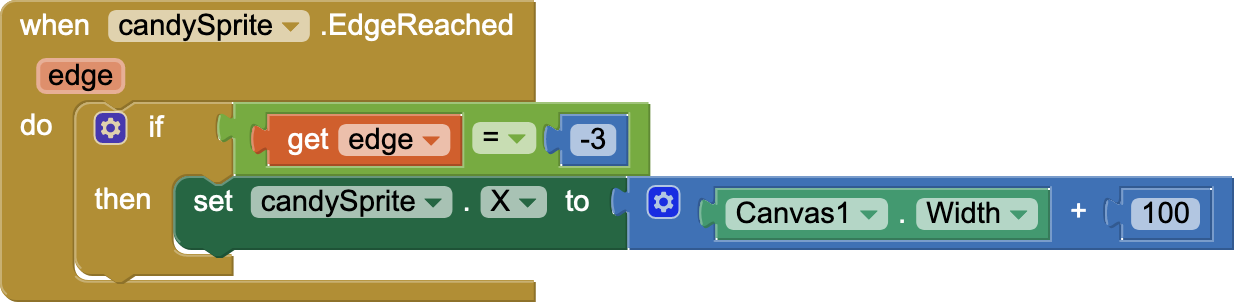
Next is our candy animation which should also start when the start button is pressed so just make the speed of candy=18 in the start button click event code. This will make the candy start moving towards the left.
But what happens when it reaches the left edge of the screen? We will bring it back to its starting position by first checking if it was the left edge which should be -3.
So, now our candy should move infinitely and our Santa should be running infinitely while standing in one place when the start button is pressed. You can test your code using emulator or companion app.
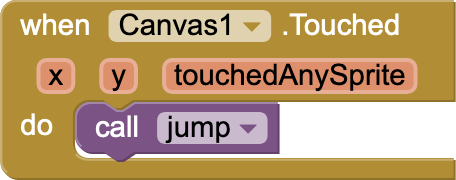
We will make Santa jump when the canvas is touched. So get canvas.touched event. Make a procedure named jump and call it on canvas touch event.
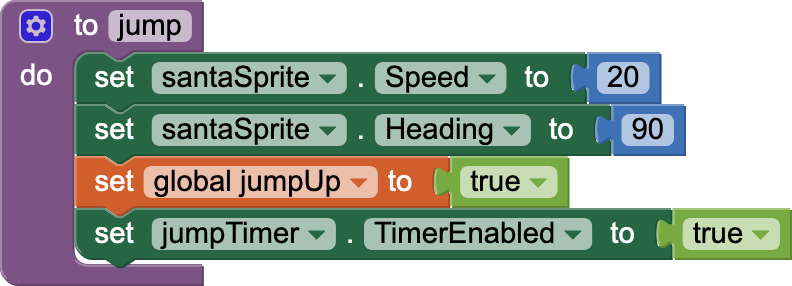
In the jump procedure, we make the speed of santaSprite= 20 and heading 90 so that it goes up. We set our jumpUp variable to be true. And we enable our jumpTimer (remember that it will trigger or fire after 800 ms). Before this time is up, our Santa will keep on going up.
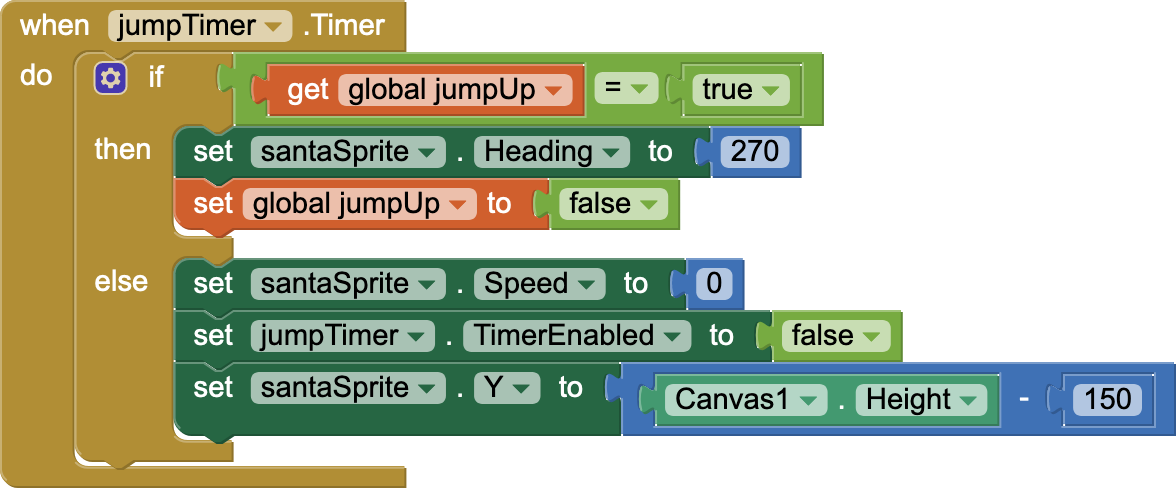
When the jump timer goes off, we will check if Santa was going up and change its heading to 270 to make it start coming down now. And we will make jump up false. So, the next time the jump timer goes off, we will reset Santa's speed to 0 to stop the jump animation, disable the jump timer, and also reset Santa‘s Y position.
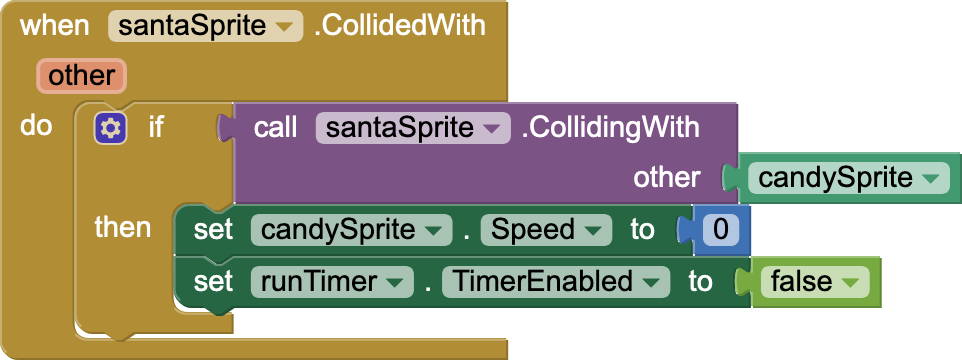
Now, the most important part of code is when Santa collides with something. Get collided with event for santaSprite. Check if colliding with candy and stop everything i.e. make the speed of candySprite=0 and disable the runTimer.
Now, what about the score? So, let’s work on that.
First of all, reset the score to 0 and enable scoreTimer when startButton is clicked.

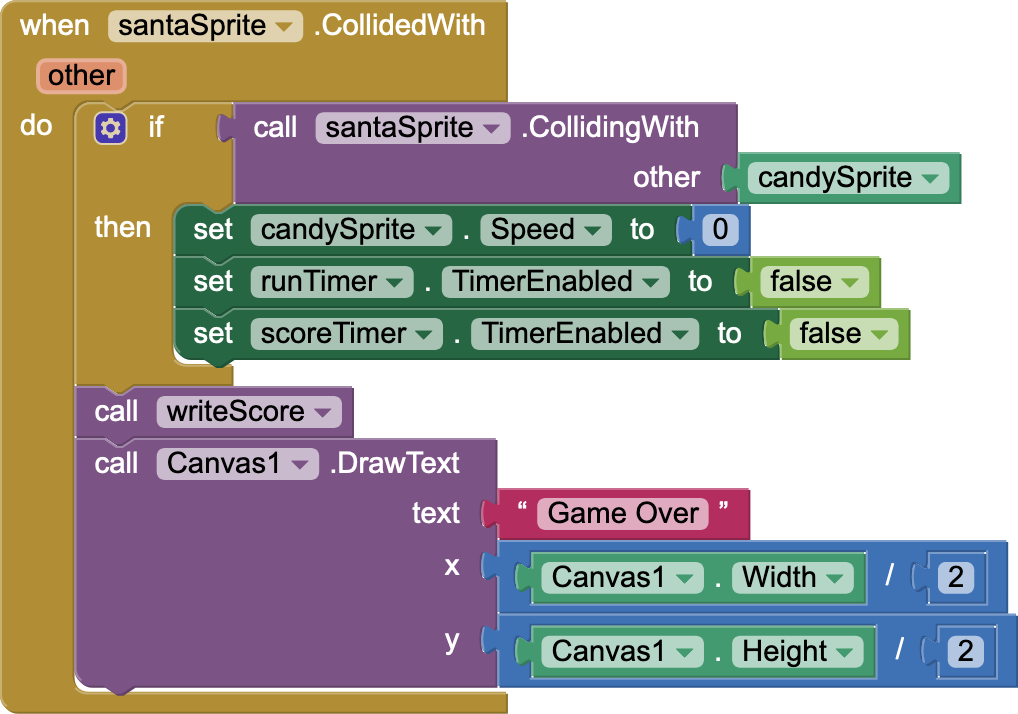
Disable scoreTimer in case of collision of santaSprite with candySprite.

Next, make a procedure for writing the score. Clear the canvas first and drawText in the middle of the canvas and write the current value of score.

Now, in case of the scoreTimer trigger event, add a 1 to the score and call the writeScore procedure.

Last is the game over message so add the writing of it and the final score in the collision event.
So, this is done. I hope you have fun making this game and customizing it to your liking.
If you like my classes, consider supporting me by buying me a cup of coffee.

You can also watch the video tutorial here:


Comments
Post a Comment